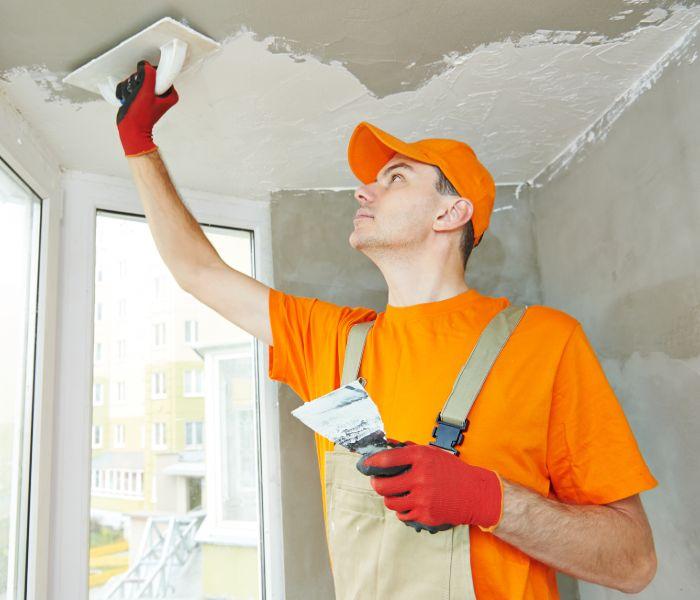
Tools and Materials Required for Plastering
Plastering projects require a range of tools and materials to ensure a smooth and professional finish. The basic tools include a trowel, hawk, and a mixing bucket. A trowel helps spread the plaster evenly on surfaces, while a hawk aids in holding the plaster ready for application. Additionally, having a spirit level is crucial for checking surfaces for evenness. Without proper tools, achieving high-quality work becomes a cumbersome task.
Specialized tools come into play for those who want to advance their plastering skills. These may include a plastering machine or a spray gun for larger jobs, saving time and labor. A corner trowel is essential for reaching edges that a standard trowel can't easily access. Not to forget, mixing paddles can simplify combining plaster with water to achieve the right consistency. Understanding when to use each tool really helps enhance the plastering process.
There is a variety of materials involved in plastering, each with specific characteristics. For instance, gypsum plaster is lightweight, making it easier for control during application. On the other hand, cement plaster is useful for external walls due to its durability against elements. Always keep an eye on the quality of the materials, as lower-quality products may not adhere well or could lead to future problems.
Given the importance of safety in any DIY project, wearing the right equipment is non-negotiable. Important safety gear includes goggles, gloves, and a dust mask to protect against inhalation of plaster dust and other particles. A hard hat should be worn when working in tighter spaces or when there's a risk of falling debris. Following safety procedures guarantees a safer work environment while enhancing focus on the task.
Surface Preparation Techniques
Before plastering, proper surface preparation is crucial. Start by cleaning the substrate thoroughly to remove dust, grease, or old paint that can hinder adhesion. You might find that a simple scrub with water or a mild detergent will do. Repair any cracks or holes in the surface to create an even base. These small steps can go a long way in ensuring the plaster adheres correctly and maintains a solid structure.
Applying a bonding agent is another step you shouldn't skip. This helpful substance ensures better adhesion between the plaster and the substrate. It creates a barrier that helps the plaster stick while also reducing the likelihood of future cracking. Once this coat dries, you can clearly observe how the plaster integrates better with the surface. It often makes a noticeable difference during the plastering process.
Using a scratch coat is another technique worth mastering. It’s a preliminary coat that serves to create a textured surface for better plaster adhesion. When applying a scratch coat, ensure to score lines into the layer before it dries, providing texture for the next coat to grip onto. This method often prevents delamination and ensures a more stable finish in the long run.
Getting the groundwork right sets the stage for a successful plaster job. Each of these preparation techniques combines to create an ideal canvas for the plaster. The effort you put into preparation often reflects in the final quality of your plaster work. Investing time here means spending less time fixing problems later.
Types of Plaster
Understanding the types of plaster can help in choosing the right one for your project. Lime plaster boasts a long history and offers flexibility. It allows buildings to breathe, which can help manage moisture. This type is perfect for older structures and places that require sustainability. The aesthetic appeal of lime plaster is also noteworthy, lending a traditional look to interiors.
Next up is cement plaster, a more modern solution that stands strong against weather. Its durability is unmatched, making it a preferred choice for external walls. Since cement plaster hardens over time, it can withstand a variety of conditions. It's worth noting that while it’s robust, cement plaster does not breathe as well as lime plaster, which might be a concern in some applications.
Gypsum plaster is another popular option, particularly in interior settings. It's easy to apply and can dry faster, which speeds up overall project timelines. Because of its smooth finish, it's often used in areas where aesthetics play a crucial role, like living rooms. It also helps in sound insulation and can regulate indoor humidity.
Lastly, there are decorative plasters that serve both functional and aesthetic purposes. These can be used to create unique textures or patterns on walls, making spaces more visually appealing. Decorative options often use additives to create styles like Venetian plaster or stucco finishes. Choosing the right plaster often depends on the nature of your project, as well as the look you want to achieve.
Basic Plastering Techniques
Moving on to basic plastering techniques, mixing plaster correctly is the first step. You should always follow the manufacturer's instructions for ratios of plaster to water. This ensures you achieve the right consistency, which is essential for application. Use a drill with a paddle attachment for mixing to save time and achieve an even blend. A smooth, lump-free mixture is crucial for performance.
Once your plaster is mixed, the next step is applying the first coat. Starting from the bottom, use your trowel to spread the plaster in small sections. Don’t rush; working in manageable areas allows you to maintain control and ensure an even application. Always apply enough pressure to embed the plaster into any surface irregularities. This coat should be even but does not have to be perfect, as subsequent layers will refine it further.
Layering additional coats is fundamental to achieving a finished look. Typically, you’ll want to wait for the first coat to set before applying the next. Ideally, each layer builds on the one before it to create a solid foundation. If you push yourself with more layers, you might find that the wall can withstand more wear and tear, ensuring longevity.
Finally, achieving a smooth finish involves careful smoothing and finishing techniques. Use a clean, wet trowel to smooth out any blemishes or rough spots after the last coat. Take your time with this process, as rushing can lead to imperfections. Once satisfied, a light buff or sanding can enhance the final appearance. The aim is to create a surface that looks excellent once painted or decorated.
Advanced Plastering Techniques
As you progress, you'll encounter various advanced plastering techniques. Veneer plastering is one of them and offers a superb finish for interior walls. This method involves applying a thin layer of plaster on top of a solid base, often drywall. By using this technique, you can create a smooth, versatile surface that impacts aesthetics heavily. It's a great choice in modern homes where sleek finishes are preferred.
Another technique worth mastering is skimming, which essentially is applying a thin layer of plaster over existing surfaces. Skimming can renew older walls that might have imperfections or previous damage. A well-executed skim can save time since it doesn’t require completely stripping the old plaster. This method can be especially useful in renovation projects, where time efficiency is key.
Creating a textured finish is a popular option for those looking to add character to their spaces. There are various techniques to achieve this, from using sponges to patterned rollers. You can even experiment with different tools to create unique styles that match your personal preference or the room's ambiance. Textured finishes can hide minor flaws effectively while enhancing the visual interest of a wall.
Lastly, ornamental plastering allows for creativity and artistry. This technique generally applies to cornices, ceilings, or other decorative elements. Whether it's a decorative border or intricate patterns, ornamental plastering adds a classic touch to interiors. Though skill-intensive, mastering this technique can significantly increase your versatility as a plasterer.
Common Problems and Solutions in Plastering
When plastering, anticipate some common problems that might arise. Cracking is perhaps the most frequent issue, commonly resulting from rapid drying or improper mixing. Always ensure to follow proper drying times and control the environment's humidity. If cracks appear, they can often be repaired easily with a patching compound, followed by a touch-up on the finish.
Another issue to note is blistering, which can occur when air becomes trapped between layers. It’s essential to apply plaster evenly and avoid applying too thick a layer. If blistering occurs, you may need to remove it entirely and reapply fresh plaster. Keeping a closer eye on application techniques can help prevent blisters altogether.
Experiencing uneven surfaces can also be troubling. This issue can stem from improper surface preparation or plaster application. A careful assessment during the application phase can help in identifying these problems early. Using a level frequently while working can minimize this risk and help produce a more uniform finish.
Lastly, efflorescence can manifest as white stains on plaster surfaces, indicating a moisture problem. It usually arises when water-soluble salts rise to the surface as water evaporates. To mitigate this issue, you should ensure the area is well-drained and moisture-resistant. Addressing moisture sources early on can save a lot of hassle down the line.
Drying and Curing Plaster
Managing the drying and curing processes is vital for successful plastering. Understanding the ideal drying conditions is the first step; generally, a room temperature between 50°F and 80°F is ideal. Proper ventilation can also aid in even drying while preventing the formation of cracks. If the environment is too humid, consider using fans to help circulate air and promote faster drying.
It's essential to monitor moisture levels after applying plaster. Too much moisture can prolong drying time and lead to problems such as mold growth or efflorescence. Regularly check the walls with a moisture meter to stay informed. Keeping a close watch ensures that your project stays on schedule and that the plaster cures correctly.
If you find that the natural drying time is too long, you can think about accelerating the drying process. Using heat lamps or space heaters can help speed things up, but be extra cautious not to apply too much heat too quickly. Rapid drying can lead to cracking and other issues, potentially compromising your overall project. Aim for a gentle warmth to encourage a more even, controlled drying.
Being mindful of these drying techniques will contribute significantly to the longevity of your plasterwork. A well-cured plaster will translate into a sturdy finish that your space can rely on. Proper drying practices foster a favorable environment for your plaster to settle and maintain its integrity.
Finishing Touches
Once the plastering job is done, applying those final finishing touches truly elevates the project. Begin with sanding and polishing the surface to remove any latent imperfections. A light touch is advisable here; you don’t want to sand away the plaster layer itself. If needed, a sanding block can provide precision, especially in tight areas. This process enhances the overall feel of the surface and prepares it for painting.
When it comes to painting and decorating over plaster, choosing the right paint type is pivotal. Always opt for breathable paints, especially for areas that are frequently exposed to moisture. Water-based paints tend to work best, providing flexibility and less likelihood of future cracking. Prior to painting, allow the plaster to cure fully to prevent moisture from getting trapped beneath the paint layer. Doing so sets your project up for success and ensures a long-lasting finish.
Maintaining plastered surfaces requires simple, regular upkeep. Maintenance tips include occasionally checking for cracks or chips to repair them early. Regular dusting will also help maintain aesthetics, keeping surfaces looking fresh. It’s important to use gentle cleaning products that won’t compromise the plaster's integrity. Careful maintenance ultimately enhances the durability of your plastered surfaces.
Completing these finishing touches not only beautifies the area but also secures the plasterwork for years to come. A careful, methodical approach to finishing creates a space that looks professional and inviting. Investing this extra time truly makes a significant difference in the overall quality of your plastering project.
Professional Tips and Tricks
Some professional tips and tricks can elevate your plastering game. Achieving a smooth finish requires practice, but a few techniques can make the process easier. Always keep your tools clean to avoid embedding dirt or old plaster into your current work. When using a trowel, make even passes, and follow the same direction to maintain consistency. Practice makes perfect, and being patient with yourself will yield better results.
Working efficiently is another key skill to master. Keep materials and tools within reach to minimize the time spent searching for what you need. Always plan your work in a logical order, so you're not backtracking. Breaking the project into smaller tasks can also improve focus and performance. Less wasted time means a smoother workflow overall.
As you continue to advance in plastering techniques, prioritizing durability will pay off significantly. Using high-quality materials ensures that your finished work will withstand wear and last longer. Remember, thorough surface preparation plays a crucial role in enhancing structural integrity. Taking the time upfront can save money and effort over time by preventing issues.
Managing large projects can be daunting, but it’s completely manageable with careful planning. Establish a well-defined timeline and stick to it to avoid overwhelming yourself. Coordination and teamwork are crucial, especially if you involve additional hands in the process. Organized planning will help ensure that all aspects of the job are executed efficiently, leading to a successful outcome.
By following these tips and integrating them into your practice, you will see a marked improvement in your plastering skills. Embracing both fundamental techniques and advanced tricks can lead you to produce high-quality results that stand the test of time. With practice, you may find the plastering process both enjoyable and rewarding.
Are you looking for professional services? Find more details here:
plasterer werribee